CI/CD for Infrastructure as Code pt 2: Running and Automating GitHub Actions (DevOps the Hard Way series)
In the previous post, we examined our scenario’s GitHub Actions workflow file. As explained in that post, a workflow file is a special yaml file which uses the “GitHub Actions workflow syntax” to declare a workflow.
In this post, we will test the workflow against our own live repository, and later configure the workflow to run automatically each time IaC updates are pushed to our repository.
Recall from the previous post that this particular workflow will require all of the following to be up and running:
- An AWS VPC, as covered in step 2 here
- A Terraform S3 backend, as covered here
- An AWS Kubernetes (EKS) cluster, as covered here
Assuming the required AWS-based infrastructure in place, we can move on to working with GitHub and GitHub Actions.
Start with a GitHub repository
Before testing the workflow provided in the DevOps the Hard Way scenario, we need access to a GitHub repository that we can write to.
Since the goal of this particular workflow is to automate changes to our own real-world Kubernetes cluster on AWS, our GitHub repository should contain IaC files that we know will work when applied to our own AWS environment.
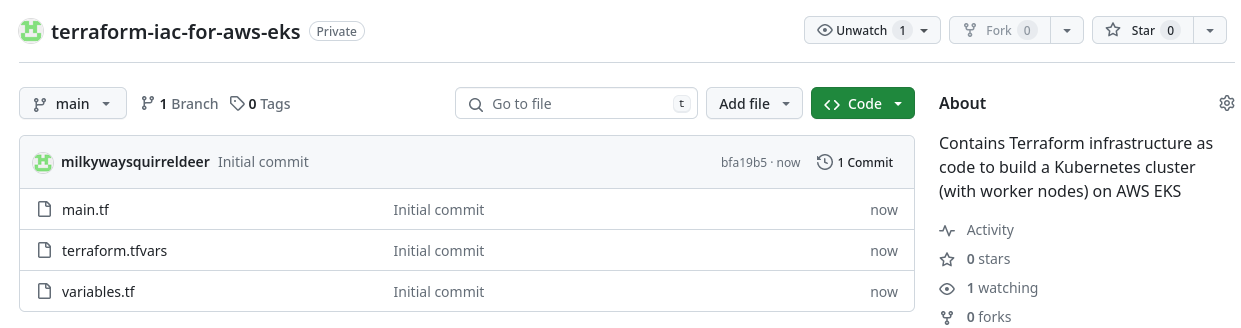
We should already have working IaC files as a result of the steps performed earlier in the Terraform section of this series. The resulting IaC files were named main.tf, variables.tf, and terraform.tfvars. We know they work in our environment because they were the IaC files used for the initial deployment of our running EKS cluster.
To meet our GitHub repository requirements, we can, for simplicity, create a new repository containing just our IaC files mentioned above, and nothing else.
Now is also a good time to set up the GitHub Actions secrets we will eventually need, as covered in the previous post.
With this GitHub repository prepared, we can test out GitHub Actions.
Optional: creating/running the GitHub Actions Demo workflow
While not part of the DevOps the Hard Way scenario, this quick demo from GitHub summarizes nicely how to create a GitHub Actions workflow. It can be useful for newcomers to GitHub Actions to start there, since the demo workflow is purposefully very simple, meaning that there is very little chance for things to go wrong.
After following the linked instructions, the demo workflow should run automatically, returning a confirmation screen similar to the one below:
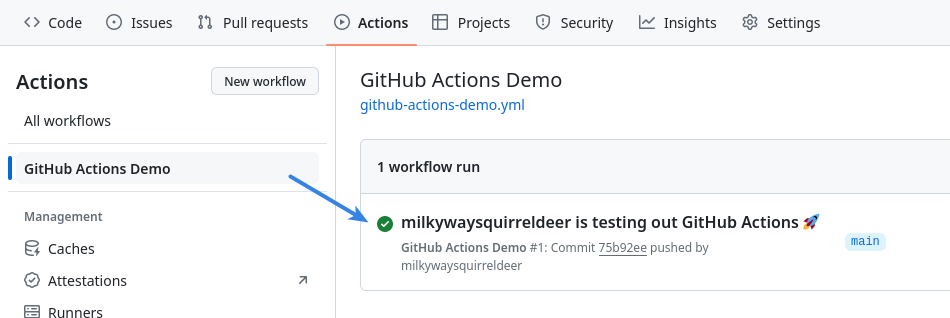
The green checkmark icon indicates that the workflow completed successfully. More info (including detailed logs, if desired), is available after clicking on the checkmarked job name.
Now that we have seen the demo workflow, it is no longer needed in our repository. To prevent the demo from running again, it should now be either:
- deleted, by removing
.github/workflows/github-actions-demo.ymlfrom the repository, or - disabled, via the
Actionstab of our GitHub repository page.
We can then try out the more complex workflow provided in the DevOps the Hard Way scenario, and see what happens.
Creating the CI workflow
The setup for this workflow is similar to the demo above, but with a new workflow filename, and of course different file contents.
Our scenario’s workflow (linked here) is called CI, and is defined in a file named main.yml. We create this CI workflow in our repository by adding a .github/workflows/main.yml file, containing the same yaml text as provided in the link.
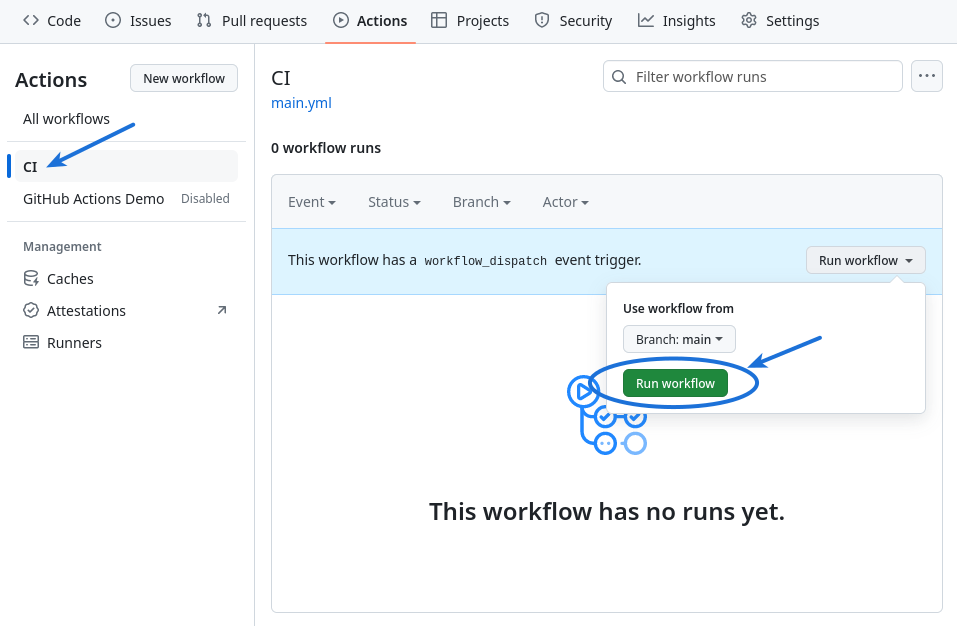
Once that is done, a new workflow named CI appears under the Actions tab in our repository.
Manually running the CI workflow
Unlike the GitHub Actions Demo workflow, the CI workflow is not written to run automatically.
In order to run the workflow, it can be selected in the left panel of the Actions tab in GitHub, and then run from the main panel.
However, the CI workflow fails shortly after it starts:
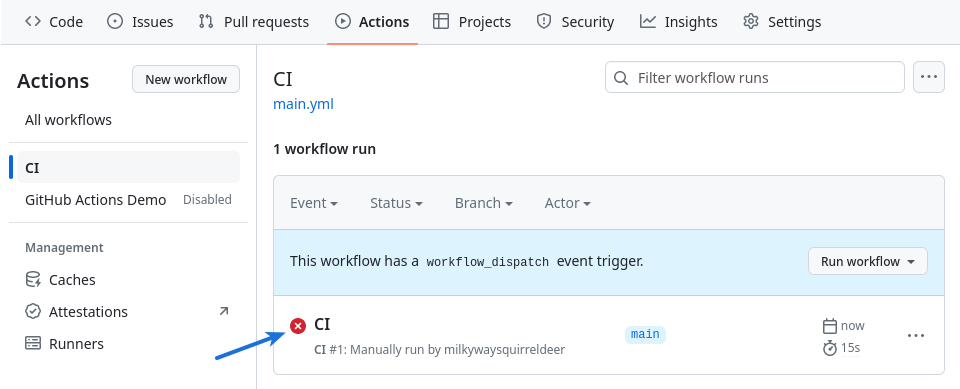
Additional detail is available by clicking on the failed workflow run (CI) marked with a red “x” icon, and then clicking on the failed workflow job’s name (build) in the next screen.
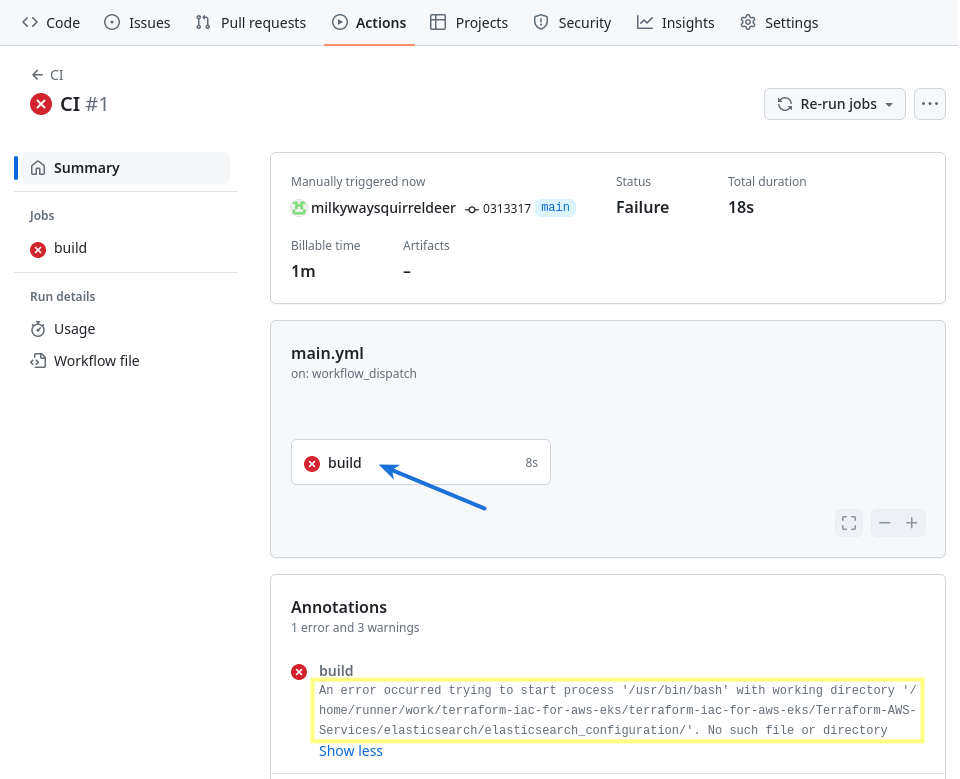
Clicking on the build job’s name reveals fully detailed job logs as shown below. In this case, those logs show us an error that caused the job to fail.
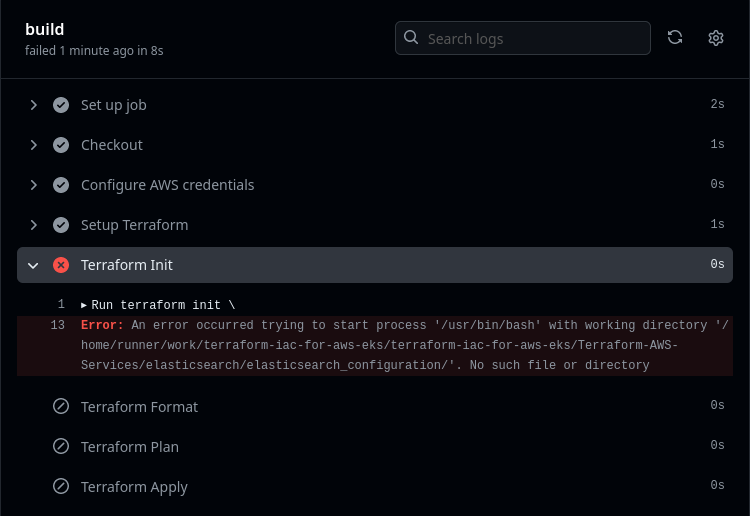
Fixing the CI workflow file
The error indicates a problem with a directory specified within the build job in the CI workflow.
After scanning through our scenario’s predefined workflow file, it appears there are a lot of unexplained things going on in there that that will prevent it from working correctly for us.
For instance, although “elasticsearch” is never mentioned in this scenario, the workflow references it constantly, both in its working-directory declarations and in arguments passed to its terraform commands.
Maybe some of these commands were repurposed by the file’s author from another project and used for this scenario, but weren’t portable for us?
We can get this workflow completing successfully by boiling down its Terraform commands to more closely match the exact commands we ran ourselves earlier, when we initially created our EKS cluster using the Terraform CLI. For example, we can:
- specify
terraform initandterraform planwithout all the extra arguments - drop the
terraform fmtcommand, which we did not use earlier - specify
terraform applyby keeping only the additional-auto-approveargument, since that will allow the apply command to complete non-interactively on its runner (no need to typeyesto confirm)
In addition to the changes above, the Terraform commands will need to be able to find our IaC files on their runner. One way to ensure this is by changing our job’s working-directory declaration for all Terraform commands, to match the directory the code is actually checked out to on the runner. That way, the Terraform commands run with our IaC present in the working directory, as was the case earlier when we ran Terraform manually.
Our updated main.yml might look something like this:
1
2
3
4
5
6
7
8
9
10
11
12
13
14
15
16
17
18
19
20
21
22
23
24
25
26
27
28
29
30
31
32
33
34
name: CI

on:
  workflow_dispatch:

jobs:
  build:
    runs-on: ubuntu-latest
    defaults:
      run:
        working-directory: /*actual_path_to_checked_out_IaC_files_on_runner*/
    steps:
      - name: Checkout
        uses: actions/checkout@v2

      - name: Configure AWS credentials
        uses: aws-actions/configure-aws-credentials@v1
        with:
          aws-access-key-id: ${{ secrets.AWS_ACCESS_KEY_ID }}
          aws-secret-access-key: ${{ secrets.AWS_SECRET_ACCESS_KEY }}
          aws-region: /*your_aws_region*/

      - name: Setup Terraform
        uses: hashicorp/setup-terraform@v1

      - name: Terraform Init
        run: terraform init

      - name: Terraform Plan
        run: terraform plan

      - name: Terraform Apply
        run: terraform apply -auto-approve
Manual CI workflow run: without any IaC changes
After this handful of adjustments, a manual run of the CI workflow completes successfully.
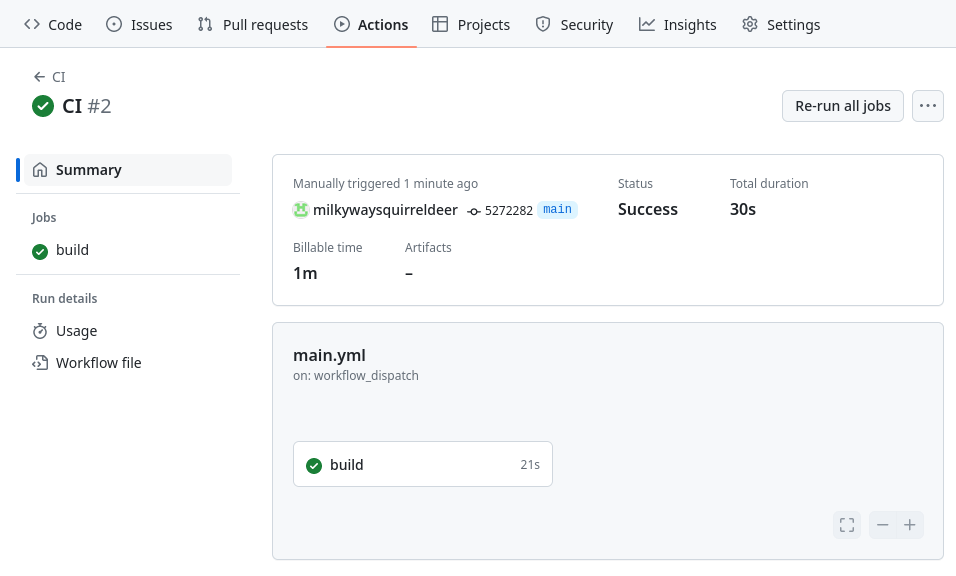
In the build job’s logs, under the Terraform Apply step, we can find out that the terraform apply command succeeded:
1
2
3
4
5
6
Run terraform apply -auto-approve
...
No changes. Your infrastructure matches the configuration.

Terraform has compared your real infrastructure against your configuration
and found no differences, so no changes are needed.
As mentioned in the logs above, nothing actually changed in our real-world AWS environment as a result of the workflow run. That is because the infrastructure declared in our IaC repository currently matches our real-world AWS infrastructure; there is nothing for Terraform to change:
Manual CI workflow run: after IaC changes
The manual run above proves that our modified CI workflow can complete successfully. However, we should still take care to verify that this workflow will actually make changes to our real-world AWS infrastructure when required.
One way to confirm that the workflow will update our real environment in response to changes we make to our IaC is, naturally, to try changing our IaC.
Changing the instance_types in main.tf
For example, imagine we want to change our real-world Kubernetes cluster to use a smaller AWS instance size. In that case, we could update main.tf in our repository, so that the instance_types line in the aws_eks_node_group resource specifies a value of t3.large instead of t3.xlarge.
Then we could try manually running the CI workflow again. In my case this workflow run took about 10 minutes:
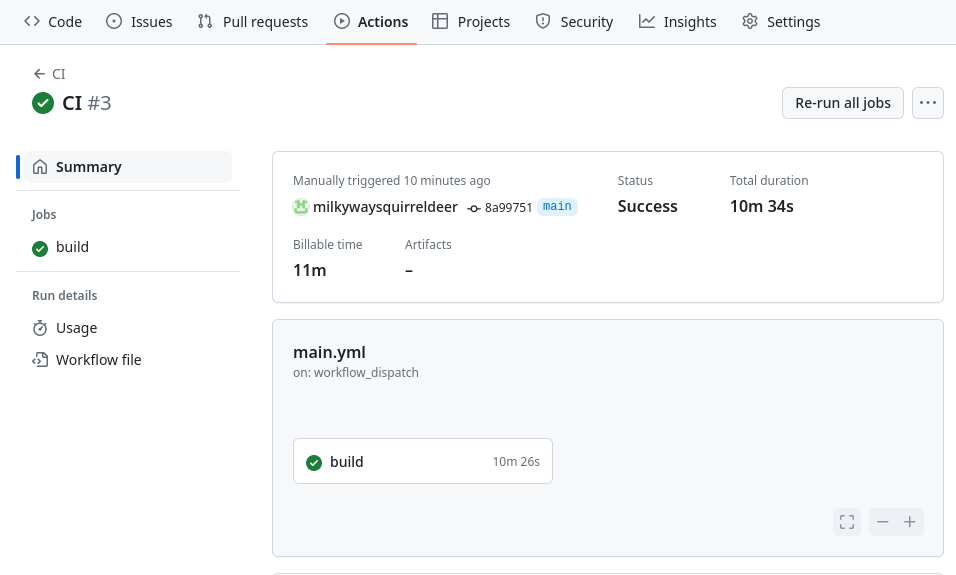
Below is an excerpt from the build job’s logs for this run of the CI workflow.
1
2
3
4
5
6
7
8
9
10
11
12
13
14
15
16
17
18
19
20
21
22
23
24
25
26
27
28
29
30
31
32
33
34
35
36
37
38
39
40
Run terraform apply -auto-approve
...
Terraform used the selected providers to generate the following execution
plan. Resource actions are indicated with the following symbols:
-/+ destroy and then create replacement
Terraform will perform the following actions:
  # aws_eks_node_group.worker-node-group must be replaced
-/+ resource "aws_eks_node_group" "worker-node-group" {
      ~ ami_type               = "AL2_x86_64" -> (known after apply)
      ~ arn                    = "arn:aws:eks:****:***:nodegroup/devopsthehardway-cluster/devopsthehardway-workernodes/2ec7f013-8995-61a2-4327-fa8ed91e28f1" -> (known after apply)
      ~ capacity_type          = "ON_DEMAND" -> (known after apply)
      ~ disk_size              = 20 -> (known after apply)
      ~ id                     = "devopsthehardway-cluster:devopsthehardway-workernodes" -> (known after apply)
      ~ instance_types         = [ # forces replacement
          ~ "t3.xlarge" -> "t3.large",
        ]
      - labels                 = {} -> null
      + node_group_name_prefix = (known after apply)
      ~ release_version        = "1.29.3-20240531" -> (known after apply)
      ~ resources              = [
          - {
              - autoscaling_groups              = [
                  - {
                      - name = "eks-devopsthehardway-workernodes-2ec7f013-8995-61a2-4327-fa8ed91e28f1"
                    },
                ]
                # (1 unchanged attribute hidden)
            },
        ] -> (known after apply)
      ~ status                 = "ACTIVE" -> (known after apply)
      - tags                   = {} -> null
      ~ tags_all               = {} -> (known after apply)
      ~ version                = "1.29" -> (known after apply)
        # (4 unchanged attributes hidden)
      - update_config {
          - max_unavailable            = 1 -> null
          - max_unavailable_percentage = 0 -> null
        }
        # (1 unchanged block hidden)
    }
As seen above, we were able to get GitHub Actions to provision changes to our real-world infrastructure based on an update we made to our IaC.
However, we did have to manually start the workflow after changing our IaC, which is not our end goal in this scenario.
The next step forward in automating our pipeline is to get this workflow to run by itself, every time we push changes to our IaC.
Automating the CI workflow
This is possible by using the following “on” declaration in our CI workflow file:
1
2
3
4
on:
  push:
    branches:
      - main
With our CI workflow file updated to contain the above, the workflow will automatically run every time we push an update to the main branch of our repository.
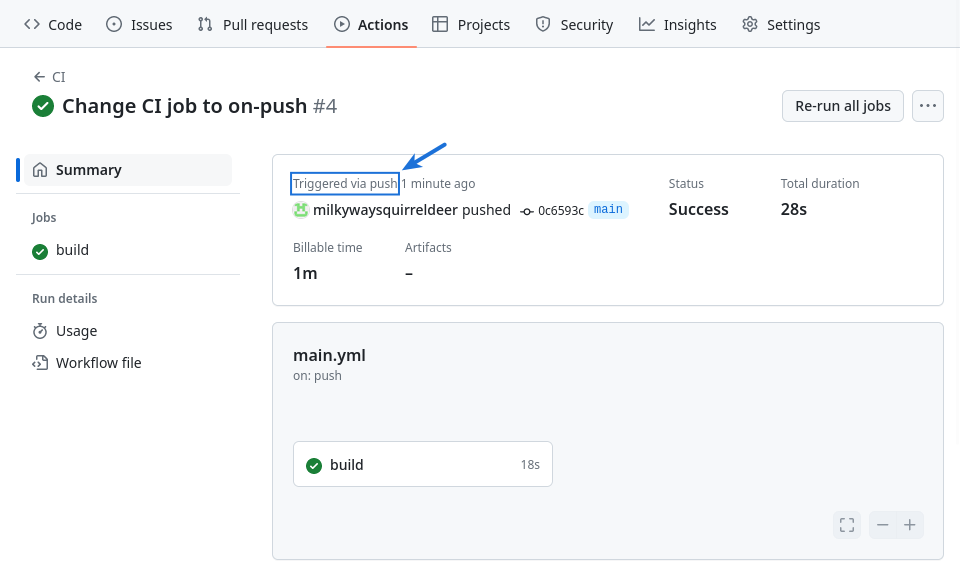
Note that includes pushing this very update to the workflow file, so as soon as that happens, the CI job runs automatically for the first time.
Since our IaC hasn’t changed since the last time the CI workflow ran, the build job completes quickly without making any changes on AWS.
Second automated run: on IaC push
If desired, we can test this workflow one more time to ensure that it will provision real AWS changes automatically when we push IaC updates to GitHub.
For example, we can try updating main.tf again, changing the instance_types declaration back to t3.xlarge from t3.large. The workflow should start automatically in response to the updated main.tf being pushed to our repository.
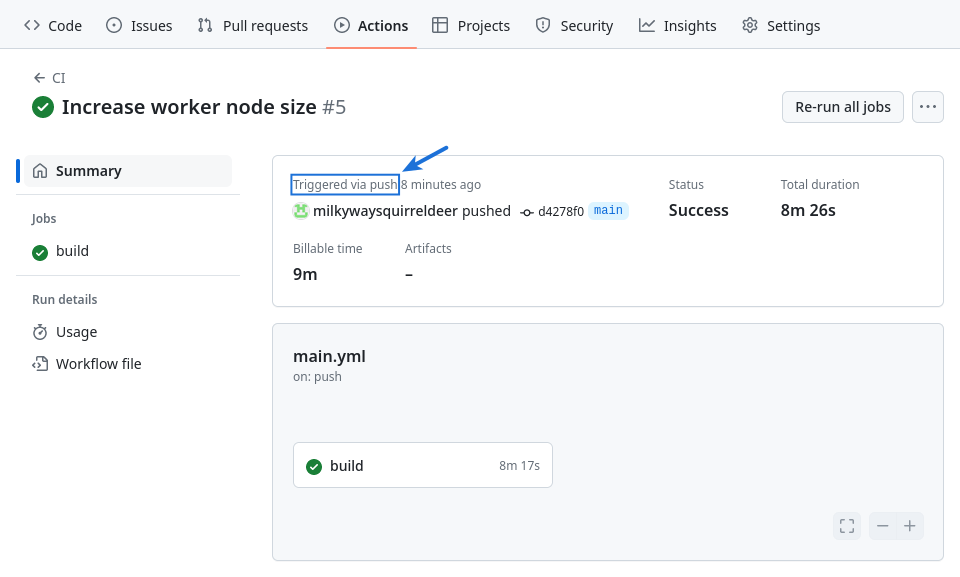
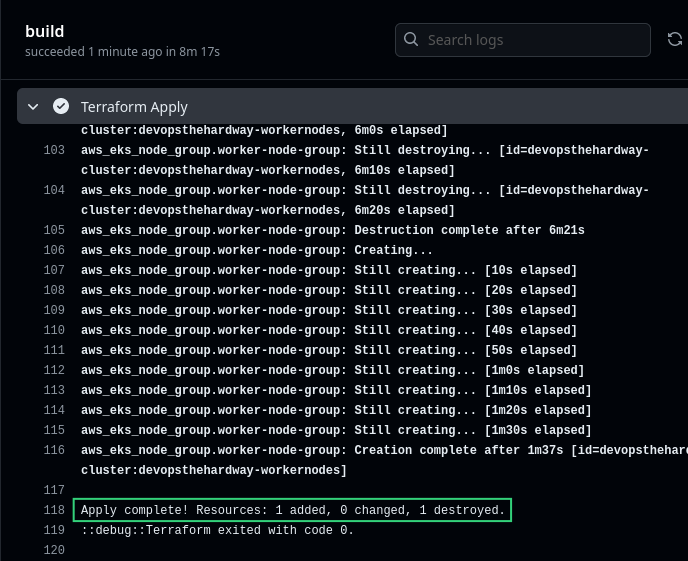
As seen above, an automated build job is triggered by the push and it completes successfully. We can also confirm in its logs that our real-world AWS environment was indeed modified behind the scenes.
With that, our final goal in the DevOps the Hard Way scenario has been fulfilled. We end with a pipeline that takes advantage of automation on top of automation:
-
First, Terraform automation (via a locally-installed Terraform CLI and configuration files) was an improvement over making AWS infrastructure changes ad-hoc using the AWS Console or AWS CLI.
-
Then, rather than having to manually run Terraform commands on our computer every time we decide to update our infrastructure as code, we had our GitHub workflow handle the Terraform commands and deploy the IaC changes to production for us.
See you in future posts!