Docker pt 2: Working with the Container Image (DevOps the Hard Way series)
In this post, the new container image created in the previous post is tested. Once verified, it is uploaded to Amazon Elastic Container Registry (ECR).
Running a container locally
docker run
The container image can be tested by running a local container from the image.
1
2
$ docker run -tid uberapp     # options used: -t = tty, -i = interactive, -d = detach
fc2c4854c2ea807cae4b86c094742797d619c624e47833c0306174318a795b66
The Docker CLI confirms the running container by outputting the container’s UUID, as seen above.
docker ps
The following command can also be used to check running containers at any time:
1
2
3
$ docker ps
CONTAINER ID   IMAGE     COMMAND           CREATED          STATUS          PORTS      NAMES
fc2c4854c2ea   uberapp   "python app.py"   14 seconds ago   Up 13 seconds   5000/tcp   busy_clarke
This confirms that the container runs fine locally, which is the only reason it was started. The container can now be stopped, by running the docker stop command and referencing it by either its ID or name.
docker stop
1
2
$ docker stop fc2c4854c2ea
fc2c4854c2ea
Docker returns the same ID or name to confirm the container has been stopped.
Saving the container image to Elastic Container Registry(ECR)
Since the container run from our image tested ok, we are ready to push the container image to ECR. The CLI commands involved can be very long with lots of room for error, so it helps to get them directly from the AWS Console.
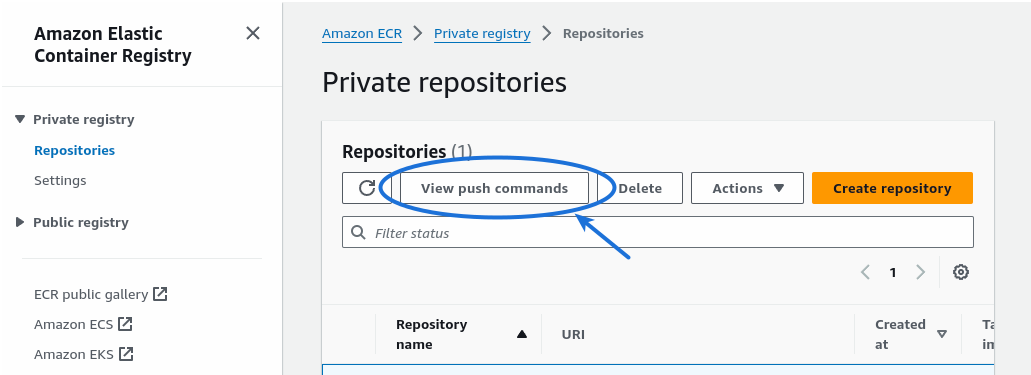
This ECR push command help can be found by logging into the AWS Console and navigating to Amazon ECR > Private Registry > Repositories, clicking the radio button for the devopsthehardway-ecr repository, then clicking the button for “View push commands”.
As seen after clicking the button above, the overall ECR image push sequence is:
- Authenticate to ECR
- Build a Container Image
- Tag the Container Image
- Push the Container Image to ECR
Below is a look at these steps in more depth.
Authenticate to ECR
The ECR authentication command from AWS will look something like this:
1
2
3
4
5
$ aws ecr get-login-password --region *your_aws_region* | \
 docker login --username AWS --password-stdin \
 *your_aws_account_id*.dkr.ecr.*your_aws_region*.amazonaws.com

Login Succeeded
For Linux users, if the above yields an error instead of a successful login, the following link may help. https://docs.docker.com/desktop/get-started/#signing-in-with-docker-desktop-for-linux
Build a container image
The docker build command was already taken care of in the previous post. Recall that it looked like this:
1
$ docker build -t uberapp .
-toption is for “tag”, used to name the image/repository for later reference- uberapp is the value for the above option
.specifies that the Dockerfile to reference during build is in the current directory
Tag the container image
The docker tag command is used to adds a new tag to the local image, linking it to the Amazon ECR created earlier.
1
$ docker tag uberapp:latest *your_aws_account_id*.dkr.ecr.*your_aws_region*.amazonaws.com/devopsthehardway-ecr:latest
Push the container image to ECR
Next, it is time to upload the image to ECR using docker push.
1
$ docker push *your_aws_account_id*.dkr.ecr.*your_aws_region*.amazonaws.com/devopsthehardway-ecr:latest
Note that this push uploads a container image larger than 1GB over the local Internet connection, so it can take some time to complete.
Once the push does complete, all that is left is to verify that the image was successfully uploaded, which can be done either via the AWS Console or CLI.
Verify the Push
1
2
3
4
5
6
7
8
9
$ aws ecr list-images --repository-name devopsthehardway-ecr
{
    "imageIds": [
        {
            "imageDigest": "sha256:****",
            "imageTag": "latest"
        }
    ]
}
To summarize, we have containerized the Uber API into a new container image, and stored that image centrally to an Amazon Elastic Container Registry by the name of devopsthehardway-ecr.
In the next post, we will connect to our Kubernetes environment (previously created on Amazon EKS) and deploy the newly-containerized Uber app.